Want to know the secret to perfect, juicy grilled chicken? Look no further than your air fryer! Yes, you read that right. The air fryer isn’t just for fries and onion rings anymore; it’s a versatile tool for cooking all sorts of meals, including deliciously grilled chicken. Grilling chicken in an air fryer is a quick and easy process, and it yields fantastic results.
The hot, circulating air of an air fryer leaves chicken perfectly cooked – crispy on the outside and juicy on the inside – without the hassle of dealing with an outdoor grill. In this article, we’ll take you through the steps of how to grill chicken in an air fryer, from selecting the right cut of meat to seasoning, cooking, and serving. So, whether you’re a seasoned air fryer pro or an enthusiastic novice, get ready to learn how to make mouthwatering grilled chicken in your air fryer that will impress your family and friends!
Preparation
Are you looking for a healthier alternative to fried chicken? Look no further than your air fryer! Making grilled chicken in an air fryer is quick, easy, and delicious. Before you start, make sure you have all the necessary ingredients: chicken breast, olive oil, your favorite spices, and an air fryer. Begin by seasoning your chicken with your desired spices.
Don’t be afraid to get creative! Let the chicken marinate for at least 30 minutes to let the flavors settle in. Preheat your air fryer to 375°F for 3-5 minutes. Brush the chicken with olive oil to give it a crispy exterior.
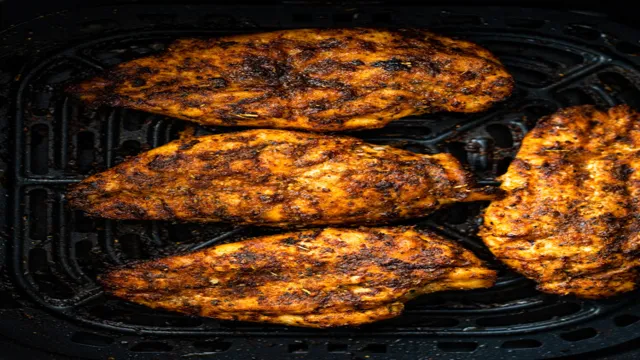
Place the chicken in the basket of the air fryer and cook it for 10-12 minutes, flipping halfway through. Use a meat thermometer to ensure the internal temperature of the chicken reaches 165°F. Once it’s cooked, let it rest for a few minutes before serving to allow the juices to redistribute.
Voila – perfect grilled chicken in an air fryer that’s both healthy and delicious!
Choose boneless chicken
If you are looking to cook up some delicious chicken for your next meal, it is important to choose boneless chicken for an easier and quicker preparation. Boneless chicken can save you a lot of time when it comes to preparing and cooking the meat. By removing the bone, you can season and marinate the chicken more evenly, resulting in a delicious and moist flavor.
Plus, it is much easier to cut and serve the chicken without having to deal with the bones. Boneless chicken can be used for a variety of dishes such as stir-fry, grilled chicken, chicken strips, and more. So, next time you’re in the meat section, opt for boneless chicken for a quick and delicious meal.

Wash chicken with cold water
When it comes to preparing chicken, one essential step is to wash it with cold water before cooking. Washing the chicken helps to remove any dirt or bacteria that may be present on its surface, ensuring that it is safe to eat. However, it’s crucial to handle the chicken properly when washing it and to take precautions to avoid contaminating other surfaces and utensils in your kitchen.
Start by placing the chicken in a cleaned sink and running cold water over it, making sure to rinse the inside and outside thoroughly. Avoid using hot water or soap, as this can actually increase the risk of contamination. Once you’ve finished washing the chicken, make sure to dry it thoroughly with paper towels and dispose of them immediately after use.
By taking the time to wash your chicken properly before cooking, you can help to ensure that your meals are both safe and delicious.
Pat it dry with paper towels
When preparing ingredients for cooking, it’s important to get them as dry as possible to ensure the best results. One simple step that can make a big difference is patting ingredients dry with paper towels. This is especially important when cooking meats or vegetables that release a lot of moisture.
Excess moisture can prevent ingredients from searing properly, leading to bland or soggy results. By patting ingredients dry with paper towels, you remove the excess moisture and create a surface that will sear nicely and develop delicious flavor. So next time you’re preparing ingredients for a meal, don’t skip the step of patting them dry.
You’ll be amazed at the difference it can make in the final product!
Season the chicken with your choice of spices
When it comes to cooking chicken, seasoning is key to bringing out its flavor and making it taste its very best. The great thing about seasoning is that you can use just about any spice or herb that you like, whether you prefer something savory or spicy. To get started, first clean your chicken and pat it dry.
Then, liberally season it with a mix of your favorite spices. You might choose something simple like salt, pepper, and garlic powder, or go for something more complex like a blend of cumin, paprika, and chili powder. Rub the spices gently into the surface of the chicken, making sure to cover it evenly on all sides.
Let the chicken marinate with the spices for at least 30 minutes to let the flavors meld together. When you’re ready to cook, you’ll be rewarded with juicy, flavorful chicken that will be the star of any meal. So go ahead and experiment with different herbs and spices to find your perfect combination.
Your taste buds will thank you!
Air Frying the Chicken
If you’re looking for a healthier version of grilled chicken, then air frying might be right up your alley! Making grilled chicken in an air fryer is actually quite easy and quick. First, you’ll want to marinate your chicken in your favorite flavors for a few hours beforehand. Then, preheat your air fryer to 400 degrees Fahrenheit and place the chicken inside.
Cook for around 8-10 minutes on each side, until the chicken is cooked thoroughly and crispy on the outside. One of the best things about air frying is that it uses hardly any oil, making it a great way to enjoy your favorite fried foods without all the guilt. Give it a try and see for yourself how delicious and easy air fried grilled chicken can be!
Preheat the air fryer to 400°F
If you’re looking for a healthier alternative to fried chicken, air frying is the way to go. Preheating your air fryer to 400°F before putting in the chicken ensures that it gets cooked evenly and retains its moisture without getting too oily. The best part about air frying is that you can achieve a crispy exterior without the use of much oil.
Plus, you’ll have less mess to clean up afterwards. Air frying not only saves time but also saves you unwanted calories, making it a great option for those who are health-conscious. So next time you’re in the mood for some fried chicken, why not give air frying a try? You’ll be amazed at how delicious and guilt-free it can be.
Put the chicken in the fryer basket
When it comes to air frying chicken, there are a few steps to follow for the perfect crispy texture and juicy inside. The first step is to put the chicken in the fryer basket. Whether you’re using chicken breast, thighs, or wings, make sure they are evenly sized and patted dry with a paper towel.
Preheat your air fryer to the desired temperature, usually between 375-400°F. Then, fill the basket with the chicken, making sure not to overcrowd it. This will allow for even cooking and a crispy result.
Set the timer for the recommended cooking time and flip the chicken halfway through for even browning. In no time, you’ll have perfectly cooked chicken with a crunchy exterior and moist interior that will have your taste buds begging for more.
Spray the chicken with cooking spray
Air frying is a healthy and quick way to cook chicken. And when air frying your chicken, spraying it with cooking spray is a crucial step. Cooking spray helps prevent the chicken from sticking to the air fryer basket and aids in even browning.
When spraying the chicken, make sure to use cooking spray sparingly to avoid excess oil buildup. Too much oil can cause the chicken to become soggy, defeating the purpose of air frying. Plus, an uneven layer of cooking spray may lead to uneven browning.
So, remember to give your chicken a light coating of cooking spray before air frying to ensure a crispy golden brown finish.
Close the basket and set the timer for 10 minutes
Air frying chicken is a great way to cook up a tasty and healthy meal quickly. Once you’ve marinated your chicken, it’s time to air fry it to perfection. Preheat your air fryer to 375°F and spray the basket with cooking spray.
Place the chicken in the basket, being careful not to overcrowd it. Close the basket and set the timer for 10 minutes. After 10 minutes, flip the chicken and air fry for another 8-10 minutes or until the internal temperature reaches 165°F.
This air frying method allows the chicken to get crispy on the outside while remaining juicy on the inside, without the need for heavy oil or breading. Plus, it’s a lot healthier than traditional frying methods. With the right seasoning and timing, you can enjoy a delicious chicken meal in no time.
Finishing Touches
Now that your grilled chicken is cooked to perfection in the air fryer, it’s time to add those finishing touches to bring out the flavor and make it truly delicious. One option is to brush on a marinade or sauce of your choice, incorporating flavors like garlic or honey mustard for a tangy twist. Another option is to sprinkle on some herbs like rosemary or thyme for an earthy flavor, or add a squeeze of lemon for some acidity.
You can also serve the grilled chicken with a side of your choice, like a fresh salad or roasted vegetables. Whatever your preference, these simple additions are sure to take your air-fried grilled chicken to the next level. So, go ahead and experiment with different flavors until you find your perfect combination.
Enjoy your tasty and healthy meal!
Take out the chicken when it’s done
When it comes to cooking chicken, knowing when it’s cooked through is essential. The best way to tell if it’s done is to use a meat thermometer. Insert it into the thickest part of the meat and ensure it reaches an internal temperature of 165°F.
If you don’t have a thermometer, you can also check for clear juices and firm flesh. Once your chicken is cooked to perfection, take it out of the oven or off the heat source and let it rest for a few minutes. This will allow the juices to redistribute throughout the meat, resulting in a more tender and juicy final product.
If you cut into the chicken right away, those flavorful juices will escape, leaving you with a dry and potentially tough piece of meat. So, take a deep breath and hold off on your chicken cravings for just a few more minutes. It’ll be worth it in the end!
Check the internal temperature for doneness (165°F)
When cooking any type of meat, it’s important to check the internal temperature for doneness before serving it. This ensures that harmful bacteria are destroyed, and the meat is safe to eat. For chicken, the internal temperature should reach 165°F.
To check this, insert a meat thermometer into the thickest part of the meat, avoiding bone and gristle. If the temperature reads below 165°F, continue cooking the chicken until it reaches the safe temperature. Once the chicken has reached the desired internal temperature, remove it from the heat and let it rest for a few minutes before cutting into it.
This will allow the juices to redistribute and ensure that the chicken is moist and delicious. By following these simple steps, you can ensure that your chicken is cooked safely and tastes amazing.
Let it rest for 5 minutes before serving
When it comes to cooking, the finishing touches can make all the difference in the world. One important finish that you should always remember is to let your food rest for a few minutes before serving. This is especially important for meats as it allows the juices to redistribute, making the meat moist and tender.
Resting your food also allows the flavors to settle and meld together, creating a more enjoyable and flavorful dish. So, when your timer goes off, resist the urge to immediately serve your dish and instead, give it a few minutes to rest. Your taste buds will thank you for it!
Conclusion
Well, there you have it. Making grilled chicken in an air fryer is simple, delicious, and leaves your taste buds begging for more. Not to mention, it’s a healthier alternative to traditional grilling methods.
So next time you’re in the mood for some juicy, flavorful chicken, don’t hesitate to turn to your trusty air fryer. Just remember to season generously, preheat the machine, and listen for that satisfying sizzle. With these tips, you’ll be able to elevate your cooking game and impress your guests (or yourself) in no time.
Happy grilling!
FAQs
What are the ingredients required to make grilled chicken in an air fryer?
The ingredients required are chicken breasts or thighs, olive oil, garlic powder, onion powder, paprika, salt, and black pepper.
How long does it take to cook grilled chicken in an air fryer?
It takes approximately 15-20 minutes to cook grilled chicken in an air fryer, depending on the thickness of the chicken.
Can you marinate the chicken before cooking it in an air fryer?
Yes, you can marinate the chicken for at least 30 minutes before cooking it in an air fryer to enhance its flavor.
Is it necessary to preheat the air fryer before cooking grilled chicken?
Yes, it is recommended to preheat the air fryer to 400°F for 5 minutes before adding the chicken to ensure even cooking.
How do you know when the grilled chicken in the air fryer is done?
You can check the internal temperature of the chicken using a meat thermometer. The temperature should be 165°F for cooked chicken. Additionally, the chicken should be juicy and tender when cut into.