
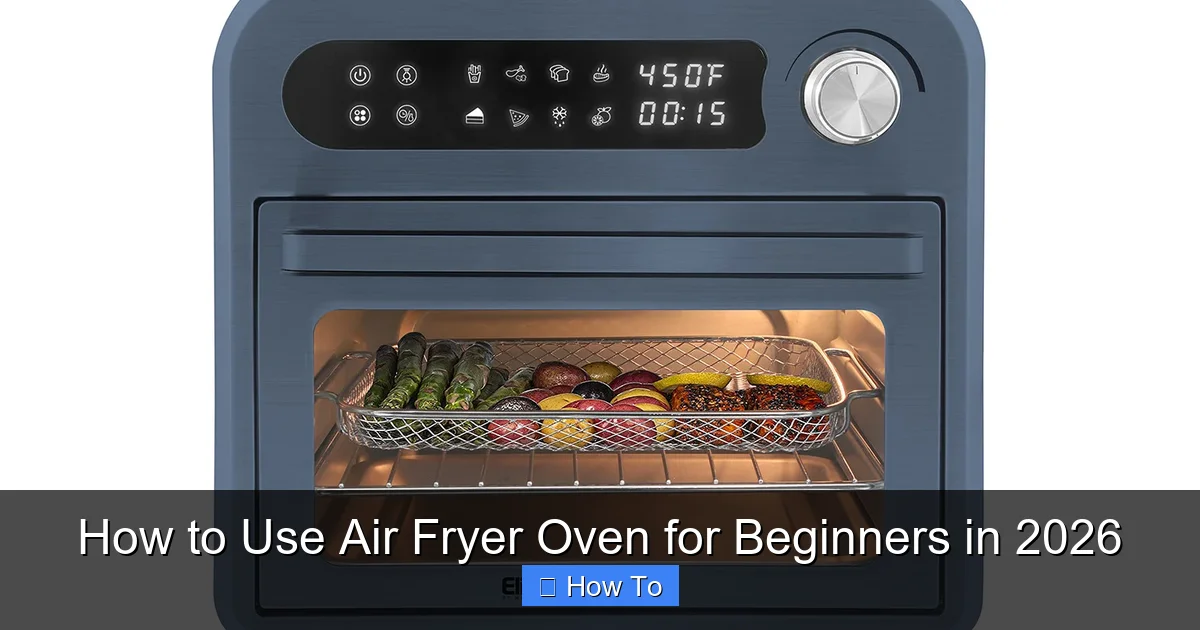
Featured image for how to use air fryer oven for beginners
Image source: cdn-s3.touchofmodern.com
Master your air fryer oven in 2026 with simple, foolproof steps designed for beginners. From preheating and setting the right temperature to mastering cook times for crispy, healthy meals, this guide breaks down everything you need to know—no experience required. Unlock faster, oil-free cooking and avoid common mistakes with expert tips that ensure perfect results every time.
“`html
How to Use Air Fryer Oven for Beginners in 2026
Key Takeaways
- Preheat your air fryer oven for consistent, crispy results every time.
- Use minimal oil—just a light spray enhances flavor without excess fat.
- Arrange food in a single layer to ensure even cooking and crispiness.
- Shake or flip halfway through cooking for uniform browning and texture.
- Clean the basket after each use to maintain performance and prevent odors.
- Experiment with settings to master cook times for different foods.
Why This Matters / Understanding the Problem
Let’s be real: cooking can feel overwhelming. Between meal planning, grocery shopping, and cleaning up, who has time for complicated recipes?
I remember my first time using an air fryer oven. I was excited—until I burned chicken tenders because I didn’t know how to use air fryer oven for beginners in 2026 properly. Sound familiar?
The good news? Air fryer ovens are way easier than they look. They save time, cut down on oil, and deliver crispy results without deep frying. But only if you use them right.
Whether you’re trying to eat healthier, simplify weeknight dinners, or just impress your kids with golden-brown nuggets, learning how to use air fryer oven for beginners in 2026 is a game-changer.
This guide isn’t about flashy marketing claims. It’s about real, practical steps based on what I’ve learned—after burning food, overcooking veggies, and finally getting it right.
What You Need
You don’t need a kitchen full of gadgets to master your air fryer oven. Just a few essentials will do.

Visual guide about how to use air fryer oven for beginners
Image source: cdn-s3.touchofmodern.com
Here’s your starter kit:
- Your air fryer oven (obviously). Most models work similarly, whether it’s a Ninja Foodi, Instant Vortex, or Cosori.
- A pair of tongs or silicone-tipped utensils—metal can scratch the basket coating.
- A spray bottle with oil (olive, avocado, or cooking spray). A light mist goes a long way.
- Oven mitts or heat-resistant gloves—trust me, you’ll thank yourself later.
- A small bowl for prepping (seasoning, tossing, etc.).
- Non-stick parchment paper or silicone liners (optional but helpful for sticky foods like cheese or marinara).
- Digital meat thermometer (highly recommended for meats and poultry).
Pro tip: Check your model’s manual. Some ovens have specific accessories (like a crisper plate or rotisserie spit). Use them! They’re designed to improve airflow and browning.
No need to buy everything at once. Start with tongs and a spray bottle. You’ll figure out the rest as you go.
Now, let’s get into the real stuff: how to use air fryer oven for beginners in 2026.
Step-by-Step Guide to How to Use Air Fryer Oven for Beginners in 2026
Step 1: Read the Manual (Yes, Really)
Yes, manuals are boring. But they’re also your best friend.
Every air fryer oven is slightly different. Some preheat automatically; others don’t. Some have preset buttons for fries, chicken, or fish. Others require manual settings.
Skipping this step is like trying to drive a car without knowing where the gas pedal is. You might get somewhere—but not safely or efficiently.
Spend 10 minutes skimming your manual. Look for:
- Preheating instructions
- Recommended cooking times for common foods
- Maximum basket capacity (overfilling = uneven cooking)
- Cleaning guidelines (especially for removable parts)
Warning: Don’t assume all air fryers work the same. I once used my friend’s “fry” setting for frozen fries—and ended up with charcoal. Turns out her model runs hotter than mine.
Step 2: Preheat When Needed (But Not Always)
Here’s a myth: “Always preheat your air fryer oven.”
Not true. Preheating matters for some foods, but not all.
When to preheat:
- Frozen foods (fries, nuggets, mozzarella sticks): Preheat 3–5 minutes at 375°F–400°F. This helps them crisp up faster.
- Baking or roasting (cookies, roasted veggies, casseroles): Preheat 5 minutes. It mimics a real oven.
- Meats (especially thick cuts): Preheat to ensure even browning and proper searing.
When to skip preheating:
- Fresh veggies (like broccoli or asparagus): Start cold. They cook quickly and don’t need extra heat upfront.
- Small or delicate items (like shrimp or fish fillets): Preheating can dry them out.
How to preheat:
- Set your desired temperature.
- Press “Start” or “Preheat.”
- Wait for the light to turn off or the beep to sound (usually 3–5 minutes).
- Add your food.
Pro tip: Use the preheat time to prep your ingredients. Chop veggies, season meat, or toss fries with oil. Multitasking = efficiency.
Step 3: Prep Your Food Like a Pro
Air fryer ovens don’t magically make soggy food crispy. The prep matters a lot.
Here’s how to prep different foods:
For frozen foods:
- No thawing needed. Seriously. Frozen fries go straight in.
- Lightly spray with oil. This helps them brown and prevents sticking.
- Shake the basket halfway through for even crispiness.
For meats (chicken, pork, steak):
- Pat dry with paper towels. Wet surfaces steam instead of sear.
- Season well, but don’t overdo salt (it draws out moisture).
- Lightly coat with oil or marinade. A thin layer is enough.
- Use a meat thermometer. Chicken should hit 165°F; pork 145°F; steak 135°F for medium-rare.
For veggies:
- Toss with 1–2 tsp oil per cup of veggies. Too much oil = soggy results.
- Add salt, pepper, garlic powder, or your favorite seasoning.
- Cut into even sizes (e.g., 1-inch broccoli florets, ½-inch potato cubes).
For baking (muffins, cookies, etc.):
- Use oven-safe pans or silicone molds that fit inside the basket.
- Don’t overfill—air needs to circulate.
- Check 2–3 minutes before the recipe says to. Air fryers cook faster than conventional ovens.
Common mistake: Drowning food in oil. I once poured half a cup of olive oil over Brussels sprouts. They came out greasy, not crispy. A light spray or toss is all you need.
Step 4: Load the Basket (Don’t Overcrowd!)
This is the #1 mistake beginners make: overfilling the basket.
Air fryers work by circulating hot air. If food is stacked or touching, air can’t reach all sides. Result? Soggy, unevenly cooked food.
Here’s the rule:
- Single layer only. No stacking. No piling.
- Leave space between items. Think of it like a parking lot—each car needs its own spot.
- For larger batches: Cook in multiple rounds. Yes, it takes longer, but the results are worth it.
How to check if you’re overloading:
- If you can’t easily shake the basket, it’s too full.
- If food is touching the heating element, remove some.
- If the basket looks like a buffet, you’ve gone too far.
Example: A 5.8-quart basket can hold about 1.5 lbs of fries—or 4–6 chicken thighs. More than that? Cook in batches.
Pro tip: For long foods like asparagus or green beans, lay them flat in a single layer. Don’t bundle them—they’ll steam, not crisp.
Step 5: Set the Right Time & Temperature
Air fryers cook faster than conventional ovens. That’s great—but it means you can’t just copy-paste oven recipes.
Here’s a quick reference guide for common foods:
| Food | Temperature | Time | Notes |
|---|---|---|---|
| Frozen fries | 400°F | 12–15 min | Shake halfway |
| Chicken tenders (fresh) | 375°F | 10–12 min | Flip halfway |
| Chicken breast (6 oz) | 360°F | 18–22 min | Check internal temp |
| Salmon fillet (6 oz) | 380°F | 10–12 min | Flip halfway |
| Brussels sprouts | 375°F | 12–15 min | Toss with oil |
| Potato wedges | 390°F | 18–22 min | Shake halfway |
| Store-bought cookies | 350°F | 8–10 min | Use silicone liner |
But here’s the thing: these are starting points. Your model, food thickness, and desired crispiness will affect the time.
Always check 2–3 minutes early. And use a meat thermometer for proteins.
Warning: Don’t set it and forget it. Air fryers cook fast. I once walked away during a 12-minute cook time—and returned to charred chicken. Set a timer and stay nearby.
Step 6: Shake, Flip, or Rotate (Mid-Cooking)
Most air fryer ovens need a mid-cooking shake or flip. Why? To ensure even browning.
Here’s when to do it:
- Frozen foods: Shake the basket halfway through. This redistributes the food and exposes new surfaces to hot air.
- Meats: Flip with tongs at the halfway mark. This ensures both sides get crispy.
- Vegetables: Toss or stir halfway. Especially for dense veggies like potatoes or carrots.
- Baking: Rotate the pan 180 degrees halfway. This compensates for any hot spots.
How to do it safely:
- Use oven mitts or gloves—the basket gets very hot.
- Pull the basket out slowly. Don’t tilt it—hot oil or juices can spill.
- Shake gently (for fries) or flip carefully (for meats).
- Slide the basket back in and resume cooking.
Pro tip: If you’re cooking multiple batches, wipe the basket with a damp cloth between rounds. Residual oil can smoke and affect flavor.
Step 7: Check for Doneness (Don’t Guess!)
“Is it done?” is the question every beginner asks.
Don’t rely on time alone. Use your senses—and tools.
Here’s how to check:
- Visual cues: Golden brown, crispy edges, no raw spots.
- Texture: Press gently with tongs. Should feel firm, not squishy.
- Internal temperature: For meats, use a thermometer. Chicken = 165°F, pork = 145°F, steak = 135°F (medium-rare).
- Smell: Burnt or acrid? Too long. Fresh and nutty? Just right.
If food isn’t done:
- Add 2–3 minutes. Check again.
- For meats, let them rest 3–5 minutes after cooking. Juices redistribute, and temp rises slightly.
If food is overcooked:
- Remove immediately. Let cool on a rack (not a plate—trapped steam makes it soggy).
- Learn for next time. Note the time and temp in a cooking journal or phone app.
Common mistake: Opening the basket too early. Every time you pull it out, heat escapes. Wait until at least halfway through the cook time.
Step 8: Clean Up (The Easy Way)
Cleaning is the part nobody likes. But with air fryer ovens, it’s actually simple.
Here’s how to clean after each use:
- Unplug and let cool (10–15 minutes).
- Remove the basket, pan, and crisper plate.
- Soak in warm, soapy water for 5–10 minutes (if needed).
- Scrub with a non-abrasive sponge or brush. Avoid steel wool—it scratches the non-stick coating.
- Rinse and dry thoroughly.
- Wipe the interior with a damp cloth. Don’t submerge the main unit.
For stubborn residue:
- Make a paste of baking soda + water. Apply, wait 10 minutes, then scrub.
- For grease, use a degreaser spray (like Dawn Powerwash) before soaking.
For weekly deep clean:
- Remove and clean the heating element (if accessible—check manual).
- Wipe the fan and vents with a dry brush or cloth.
- Check for food debris in the bottom tray.
Pro tip: Use parchment paper or silicone liners. They catch drips and make cleanup a breeze. Just lift and toss.
Pro Tips & Common Mistakes to Avoid
After using my air fryer oven for 3+ years, I’ve learned a few things the hard way.
Here are my top tips—and mistakes to avoid:
- Don’t use non-stick spray directly on the basket. It can damage the coating. Use a spray bottle with oil instead.
- Don’t cook wet batters (like tempura or beer batter). They drip and make a mess. Use panko or breadcrumbs for a crisp coating.
- Don’t ignore the drip tray. Empty it after each use. Built-up grease can smoke and smell.
- Don’t overcrowd the basket. I know I said it before, but it’s worth repeating. Single layer = crispy results.
- Don’t cook acidic foods (like tomatoes or citrus) directly in the basket. They can react with the coating. Use a liner or oven-safe pan.
My biggest mistake: I once tried to cook a whole chicken in my 5-quart air fryer. It didn’t fit. I forced it in, and the chicken touched the heating element. Smoked up the kitchen and ruined dinner. Learn from my pain: check size limits!
Now, the good stuff—pro tips:
- Reheat leftovers like a pro. Air fryer ovens reheat pizza, fries, and chicken better than microwaves. 3–5 minutes at 350°F restores crispiness.
- Use it for dehydrating. Thin slices of apples, bananas, or zucchini at 175°F for 4–6 hours make healthy snacks.
- Make “baked” eggs. Crack eggs into a silicone cup, add cheese or veggies, and cook at 320°F for 8–10 minutes.
- Roast garlic. Whole cloves in foil at 400°F for 15 minutes—sweet, soft, and perfect for spreads.
- Toast nuts or seeds. 350°F for 5–7 minutes. Shake halfway.
Mastering how to use air fryer oven for beginners in 2026 isn’t about perfection. It’s about progress. Each meal teaches you something new.
FAQs About How to Use Air Fryer Oven for Beginners in 2026
Q: Can I put aluminum foil in my air fryer oven?
Yes—but with caution. You can line the basket or pan with foil, but leave the sides open so air can circulate. Never cover the heating element. And avoid acidic foods (like tomatoes) with foil—they can react.
Q: Do I need to use oil?
It depends. Frozen foods and meats often come with enough oil. But for fresh veggies or homemade fries, a light spray or toss (1–2 tsp per cup) helps crispiness. Skip oil if you’re cooking something already fatty (like bacon).
Q: Can I cook multiple foods at once?
Sometimes. If foods have similar cook times and temps (like chicken nuggets + fries), you can layer them. Use a crisper plate for the top layer. But if times differ (like veggies + chicken), cook separately. Mixed results are better than ruined food.
Q: Why is my food not crispy?
Common causes: too much oil, overcrowding, not preheating (when needed), or cooking wet foods (like marinated chicken without drying). Try patting food dry, using less oil, and ensuring a single layer.
Q: Can I use glass or ceramic pans?
Yes, if they’re oven-safe and fit in the basket. But avoid glass if your model has a rotisserie function—it could shatter. Silicone or metal pans work best.
Q: How long do air fryer ovens last?
With proper care, 5–10 years. Avoid harsh cleaners, overheating, and physical damage. My first one lasted 7 years before the fan gave out.
Q: Are air fryer ovens healthy?
They can be. They use 70–80% less oil than deep frying. But “healthy” depends on what you cook. Air-fried chicken nuggets aren’t health food—but roasted sweet potatoes with a drizzle of olive oil? Absolutely.
Final Thoughts
Learning how to use air fryer oven for beginners in 2026 isn’t about following rules. It’s about building confidence.
Start simple. Try frozen fries or chicken tenders. Master the basics: preheating (when needed), not overcrowding, and checking for doneness.
Then experiment. Roast veggies. Bake cookies. Reheat pizza. Each meal teaches you something new.
Remember: every cook has burned food. I did. You might too. But that’s part of the journey.
Your air fryer oven isn’t just a gadget. It’s a tool for healthier, faster, tastier meals—with less cleanup.
So go ahead. Pull it out. Try one recipe today. And when you nail that perfect batch of crispy sweet potato fries, you’ll know it was worth it.
Happy air frying!
“`