
Featured image for nuwave air fryer guide
Image source: i.pinimg.com
Master your Nuwave air fryer with expert tips and foolproof recipes designed for crispy, delicious results every time. From golden fries to juicy chicken wings, this guide unlocks the full potential of your appliance with easy-to-follow techniques, optimal temperature settings, and time-saving tricks. Whether you’re a beginner or a seasoned air fryer user, elevate your cooking game and enjoy healthier meals without sacrificing flavor.
Key Takeaways
- Preheat for crispiness: Always preheat your Nuwave air fryer for evenly cooked, crispy results.
- Use minimal oil: Achieve fried textures with just 1 tsp oil—healthier and equally delicious.
- Shake the basket: Shake food halfway through cooking for uniform browning and texture.
- Master time/temp: Adjust settings based on thickness—thinner cuts cook faster at higher temps.
- Clean after cooling: Wipe the basket post-use to maintain performance and longevity.
- Try diverse recipes: Experiment with desserts, veggies, and meats for versatile meals.
📑 Table of Contents
- Why the Nuwave Air Fryer Might Be Your Kitchen’s New Best Friend
- How the Nuwave Air Fryer Works (And Why It’s Different)
- Getting Started: Setup, Safety, and Pro Tips
- Nuwave Air Fryer Recipes: From Breakfast to Dessert
- Maintenance and Cleaning: Keep Your Nuwave in Top Shape
- Nuwave vs. The Competition: How It Stacks Up
- Final Thoughts: Is the Nuwave Air Fryer Worth It?
Why the Nuwave Air Fryer Might Be Your Kitchen’s New Best Friend
Let’s be honest—kitchen gadgets are hit or miss. Some promise to revolutionize your cooking, only to end up collecting dust in a cabinet. But every once in a while, you stumble on something that actually delivers. For me, that was the Nuwave Air Fryer. It started as a curiosity, a sleek black appliance that promised crispy fries without the guilt of deep frying. But within a week, it became my go-to tool for everything from reheating leftovers to making full meals from scratch. If you’ve ever stood in front of your stove, debating whether it’s worth the time and mess to cook something, the Nuwave might just change your mind.
What sets the Nuwave apart isn’t just its ability to air fry (though that’s a big part of it). It’s the versatility. Whether you’re cooking frozen snacks, roasting vegetables, or even baking desserts, this little machine handles it all with surprising ease. I’ve used mine for everything from crispy chicken wings to fluffy banana bread—and yes, even reheating pizza without it turning into a soggy mess. But like any kitchen tool, it takes a little practice to get the most out of it. That’s where this guide comes in. Whether you’re a first-time air fryer user or you’ve been using the Nuwave for years, I’ll share the tips, tricks, and recipes that helped me master mine—and hopefully save you a few trial-and-error meals along the way.
How the Nuwave Air Fryer Works (And Why It’s Different)
The Science Behind Crispy, Guilt-Free Cooking
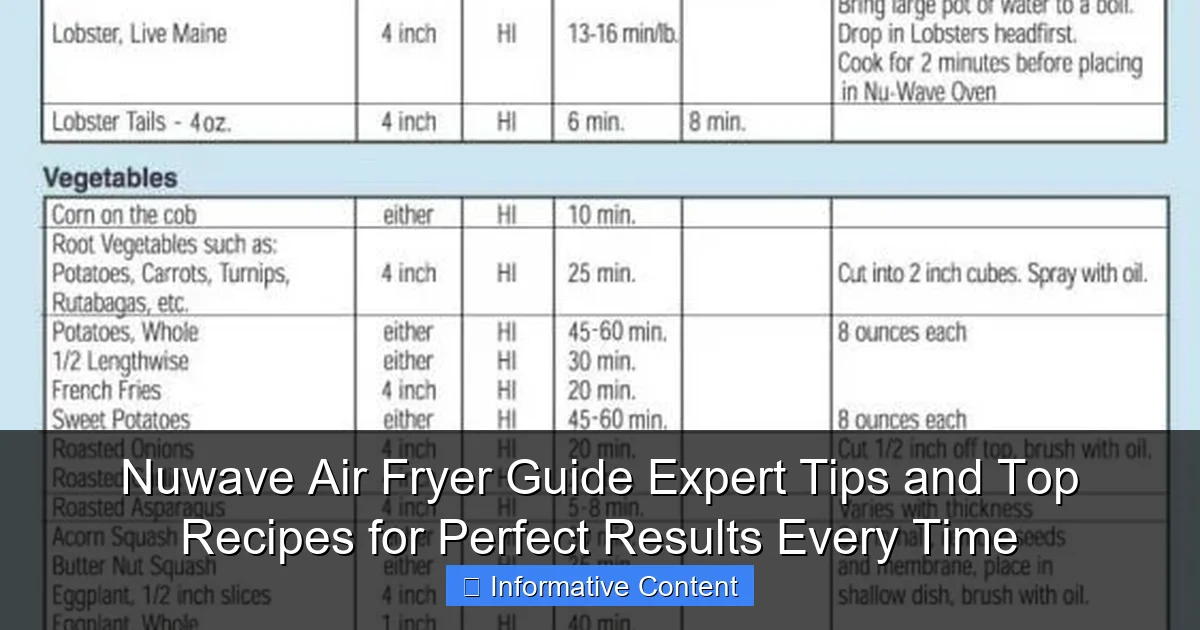
At its core, the Nuwave Air Fryer uses rapid air technology to circulate hot air around your food. Think of it like a mini convection oven, but with a twist: the air is superheated and moves at high speeds, creating that crispy, golden exterior we all crave—without drowning your food in oil. Most air fryers use 70-80% less oil than traditional frying, and the Nuwave is no exception. But what really sets it apart is its precision.
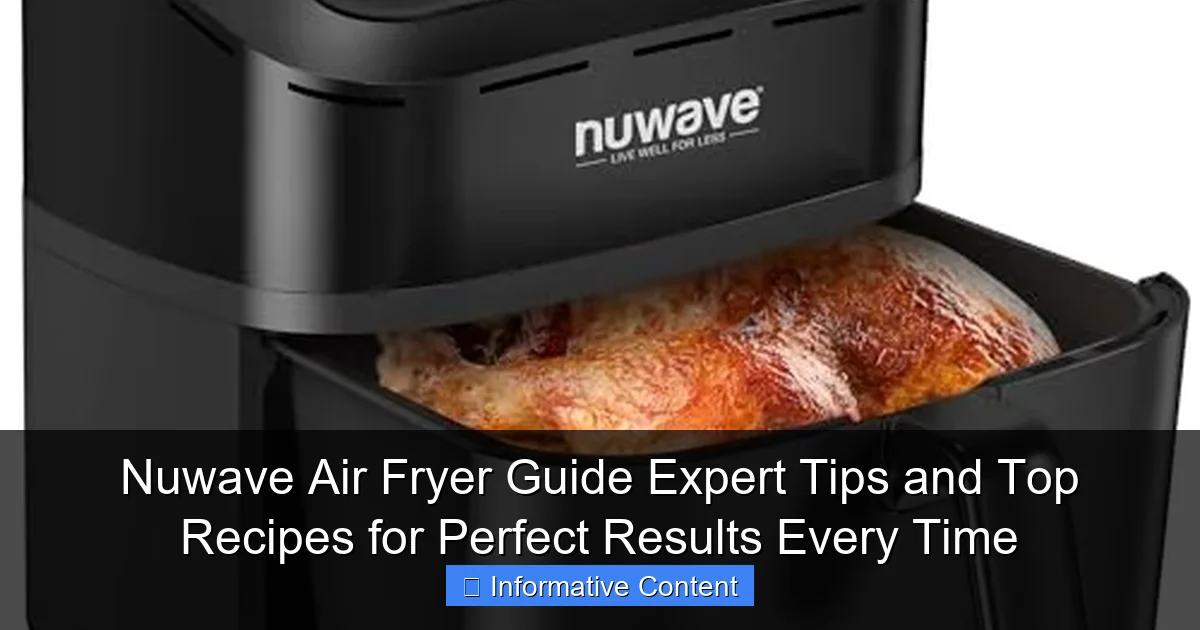
Visual guide about nuwave air fryer guide
Image source: m.media-amazon.com
Unlike some air fryers that rely on preprogrammed settings, the Nuwave lets you fine-tune temperature and time down to the minute. This is a game-changer for foods that need extra attention, like delicate fish or roasted vegetables that you want tender inside but crisp outside. For example, I’ve found that setting my Nuwave to 350°F for 12 minutes gives me perfectly roasted Brussels sprouts—crispy on the outside, tender on the inside—without needing to toss them halfway through.
Key Features That Make Nuwave Stand Out
- Digital controls: No guessing games here. The Nuwave’s display shows exact temperatures (from 100°F to 400°F) and timers, so you’re always in control.
- Large capacity: Models range from 3.5 to 8 quarts, so whether you’re cooking for one or a family of four, there’s a size for you.
- Non-stick baskets: Cleanup is a breeze. Just toss the basket in the sink with warm, soapy water (or the dishwasher, if your model allows).
- Preheat option: A small but crucial feature. Preheating ensures your food starts cooking the moment it hits the basket, which is why your fries come out crispy, not soggy.
One thing I love is how the Nuwave adapts to your cooking style. For instance, if you’re used to stovetop cooking, you might instinctively want to shake the basket every few minutes to prevent sticking. With the Nuwave, you can do that—but you don’t have to. The air circulation is so even that foods like chicken tenders or sweet potato fries rarely stick, even if you leave them alone. That said, a quick shake halfway through can help with browning, especially for thicker cuts of meat or dense vegetables.
Getting Started: Setup, Safety, and Pro Tips
Unboxing and First-Time Setup
Opening your Nuwave for the first time feels like unwrapping a new gadget—exciting but a little overwhelming. Here’s what to expect:
- Remove packaging: Take out the air fryer, basket, and any included accessories (like a divider or grill pan).
- Wash the basket and drawer: Even though it’s non-stick, give it a quick wash with warm, soapy water to remove any factory residue.
- Place it on a heat-resistant surface: The Nuwave needs about 5 inches of clearance on all sides for proper ventilation. Countertops work great, but avoid placing it near curtains or paper towels.
- Plug it in and test the controls: Press the power button, set it to 350°F, and let it preheat for 3 minutes. This burns off any manufacturing oils and ensures it’s working properly.
Pro tip: Always preheat. It might seem like an extra step, but it makes a huge difference. I once skipped preheating to save time, and my chicken nuggets came out greasy and undercooked. Lesson learned!
Safety Tips You Shouldn’t Skip
- Never overfill the basket: Overcrowding blocks air circulation, leading to uneven cooking. Stick to the “fill line” (usually about ¾ full).
- Use oven mitts: The basket gets hot. Even after unplugging, it can retain heat for 30+ minutes.
- Avoid plastic utensils: They can scratch the non-stick coating. Opt for silicone or wooden tools instead.
- Don’t use aerosol sprays: They can damage the non-stick surface. Instead, lightly brush oil with a pastry brush or use a spray bottle.
Pro Tips for Better Results
After months of experimenting, I’ve picked up a few tricks:
- Pat food dry before cooking: Moisture is the enemy of crispiness. For chicken wings, I blot them with paper towels and let them air-dry for 10 minutes first.
- Use a light oil spray: A quick spritz of avocado or canola oil (1/2 tsp per serving) helps achieve that golden-brown finish.
- Don’t overcrowd—batch cook if needed: If you’re making 2 pounds of fries, cook them in two batches. The difference in texture is worth it.
- Let it rest after cooking: Just like with oven-baked dishes, giving food a minute or two to rest helps flavors settle and prevents steam from making things soggy.
Nuwave Air Fryer Recipes: From Breakfast to Dessert
Breakfast: Crispy Hash Browns in 12 Minutes
Who says air fryers are just for dinner? These hash browns are my weekend go-to—crispy on the outside, fluffy inside, and ready in less time than it takes to brew coffee.
Ingredients:
- 2 cups shredded potatoes (or frozen hash browns)
- 1 tbsp olive oil
- ½ tsp garlic powder
- ½ tsp paprika
- Salt and pepper to taste
Steps:
- Toss potatoes with oil and seasonings.
- Preheat Nuwave to 375°F.
- Add hash browns in a single layer (don’t overcrowd!).
- Cook 6 minutes, flip, then cook 6 more minutes.
- Serve with ketchup or hot sauce.
Pro tip: For extra crispiness, spray the basket with oil before adding the potatoes.
Lunch: Crispy Chicken Tenders (No Breading, No Problem)
These tenders are a hit with kids and adults alike. The secret? A light dusting of cornstarch for crunch, plus a touch of smoked paprika for depth.
Ingredients:
- 1 lb chicken tenders
- ½ cup cornstarch
- 1 tsp smoked paprika
- ½ tsp garlic powder
- ½ tsp onion powder
- ½ tsp salt
- 1 tbsp olive oil
Steps:
- Mix cornstarch and seasonings in a bowl.
- Toss chicken in the mixture, then drizzle with oil.
- Preheat Nuwave to 400°F.
- Cook 8 minutes, flip, then cook 7 more minutes.
- Serve with honey mustard or BBQ sauce.
Dinner: Garlic Butter Salmon (Ready in 10 Minutes)
This salmon is so easy, it’s my go-to “I forgot to plan dinner” meal. The garlic butter keeps it moist, and the Nuwave gives it a perfect sear.
Ingredients:
- 2 salmon fillets (6 oz each)
- 2 tbsp butter, melted
- 2 garlic cloves, minced
- 1 tsp lemon juice
- ½ tsp dried dill
- Salt and pepper to taste
Steps:
- Mix butter, garlic, lemon juice, and dill.
- Brush mixture over salmon.
- Preheat Nuwave to 375°F.
- Cook 8-10 minutes (depending on thickness).
- Let rest 2 minutes before serving.
Dessert: Cinnamon Sugar Donut Holes
Yes, you can bake in your Nuwave! These donut holes are a fun treat—crispy outside, soft inside, and ready in under 15 minutes.
Ingredients:
- 1 can refrigerated biscuit dough
- 2 tbsp melted butter
- ½ cup sugar
- 1 tsp cinnamon
Steps:
- Cut each biscuit into 4 pieces.
- Preheat Nuwave to 350°F.
- Cook 5 minutes, shake basket, then cook 5 more minutes.
- Toss in butter, then coat in cinnamon sugar.
Maintenance and Cleaning: Keep Your Nuwave in Top Shape
Daily Cleaning Routine
The Nuwave is not a “set it and forget it” appliance when it comes to cleaning. Here’s my routine:
- After each use: Let the basket cool for 5-10 minutes, then wash with warm, soapy water. A soft sponge works best—no steel wool!
- For stubborn residue: Soak the basket in hot water for 15 minutes, then scrub with a non-abrasive pad.
- Wipe down the exterior: Use a damp cloth to remove fingerprints or splatters.
Pro tip: Never submerge the main unit in water. The heating element and electronics are not waterproof.
Deep Cleaning (Once a Month)
Every 4 weeks, I give my Nuwave a deeper clean to prevent buildup:
- Remove the basket and drawer. Soak them in warm, soapy water with a splash of white vinegar (this helps dissolve grease).
- Wipe the heating element with a dry microfiber cloth (if accessible—check your manual first).
- Use a cotton swab to clean around the control panel’s edges.
- Let everything air-dry completely before reassembling.
When to Replace Parts
The non-stick coating can wear down over time. Here’s how to know when it’s time for a new basket:
- Visible scratches or flakes
- Food sticks consistently, even after cleaning
- Discoloration that doesn’t come off with cleaning
Most Nuwave models have replacement baskets available—check the manufacturer’s website or Amazon.
Nuwave vs. The Competition: How It Stacks Up
With so many air fryers on the market, how does the Nuwave compare? I’ve tested a few popular models (like the Ninja Air Fryer and Instant Vortex), and here’s what I found:
| Feature | Nuwave | Ninja Air Fryer | Instant Vortex |
|---|---|---|---|
| Temperature Range | 100°F–400°F | 105°F–400°F | 105°F–400°F |
| Preheat Function | Yes (manual) | Yes (automatic) | Yes (automatic) |
| Basket Size | 3.5–8 quarts | 4–8 quarts | 6–8 quarts |
| Noise Level | Moderate (65 dB) | Loud (70+ dB) | Moderate (65 dB) |
| Ease of Cleaning | Excellent (non-stick + dishwasher-safe) | Good (non-stick, hand-wash recommended) | Good (non-stick, hand-wash recommended) |
| Price Range | $80–$150 | $100–$180 | $90–$160 |
The Nuwave shines in customization—its precise temperature control and manual preheat option make it ideal for cooks who like to experiment. However, it’s slightly louder than some competitors, and the basket handles aren’t as sturdy as Ninja’s. If you prioritize quiet operation or automatic preheating, the Instant Vortex might be a better fit. But for versatility and value, the Nuwave is hard to beat.
Final Thoughts: Is the Nuwave Air Fryer Worth It?
After months of using my Nuwave daily, I can confidently say it’s one of the most useful tools in my kitchen. It’s not perfect—the noise level can be a bit much, and the learning curve means your first batch of fries might not be restaurant-quality. But once you get the hang of it? Game-changer. From crispy snacks to full meals, the Nuwave handles everything with minimal effort and cleanup.
The key to success is practice and patience. Don’t be afraid to experiment with temperatures and times—what works for chicken wings might not work for zucchini fries. And remember: preheating, not overcrowding, and using a light oil spray are your best friends. Whether you’re a busy parent, a meal prepper, or just someone who loves crispy food without the guilt, the Nuwave delivers. So go ahead—try that recipe you’ve been eyeing. With the right tips, you’ll get perfect results every time. Happy air frying!
Frequently Asked Questions
What is the Nuwave Air Fryer and how does it work?
The Nuwave Air Fryer is a countertop appliance that uses rapid hot air circulation to cook food with little to no oil, delivering crispy, restaurant-quality results. Its convection technology ensures even cooking by distributing heat evenly around the food.
How do I use the Nuwave Air Fryer for the first time?
Before first use, wash the basket and pan with warm, soapy water, then preheat the air fryer for 5 minutes at 350°F to burn off any manufacturing residues. After preheating, you’re ready to start cooking with your Nuwave Air Fryer using your favorite recipes.
What are the best recipes for my Nuwave Air Fryer?
Top recipes include crispy chicken wings, garlic roasted vegetables, salmon fillets, and even desserts like air-fried apples. The Nuwave Air Fryer guide offers tested recipes with precise temperature and time settings for perfect results every time.
Can I cook frozen foods in the Nuwave Air Fryer?
Yes, the Nuwave Air Fryer excels at cooking frozen foods like fries, nuggets, and pizza rolls without thawing. Simply add 1–3 minutes to the recommended cook time and shake the basket halfway through for even browning.
How do I clean and maintain my Nuwave Air Fryer?
The non-stick basket and pan are dishwasher-safe, but hand-washing with a soft sponge is recommended to prolong their life. Wipe the exterior with a damp cloth and avoid submerging the main unit in water.
What makes the Nuwave Air Fryer different from other air fryers?
The Nuwave Air Fryer stands out with its intuitive digital controls, pre-programmed settings, and precise temperature adjustments (in 5°F increments). Its compact design and energy efficiency make it ideal for quick, healthy meals.