
Featured image for can i cook frozen garlic bread in an air fryer
Yes, you can cook frozen garlic bread in an air fryer—it’s the fastest, crispiest way to enjoy it without thawing. Simply preheat the air fryer to 360°F (182°C), cook for 4–6 minutes, and flip halfway for golden, buttery perfection. No soggy microwave mess—just restaurant-quality garlic bread in minutes.
Key Takeaways
- Yes, you can cook frozen garlic bread in an air fryer—it’s quick and delivers crispy results.
- Preheat the air fryer for even cooking and better texture every time.
- Cook at 350°F (175°C) for 4–6 minutes; adjust based on thickness.
- Flip halfway through to ensure golden, evenly toasted garlic bread.
- No thawing needed—cook directly from frozen for convenience and speed.
- Check at 4 minutes to avoid burning, especially in smaller air fryers.
📑 Table of Contents
- Can I Cook Frozen Garlic Bread in an Air Fryer? A Quick and Easy Guide
- Why Your Air Fryer Is the Perfect Tool for Frozen Garlic Bread
- Step-by-Step Guide: How to Cook Frozen Garlic Bread in an Air Fryer
- Tips and Tricks for Perfect Air-Fried Garlic Bread
- Common Mistakes and How to Avoid Them
- Air Fryer Garlic Bread: Brand-Specific Tips and Data
- Final Thoughts: Yes, You Can—and You Should!
Can I Cook Frozen Garlic Bread in an Air Fryer? A Quick and Easy Guide
Let’s be real: frozen garlic bread is a kitchen superhero. It’s the savior of busy weeknights, the sidekick to pasta dinners, and the go-to for last-minute guests. But here’s the thing—traditional oven baking can feel like overkill when you’re just craving a few golden, buttery slices. That’s where your air fryer swoops in like a tiny, turbo-powered oven ready to save the day. If you’ve ever stood in front of your freezer, garlic bread in hand, wondering, “Can I cook frozen garlic bread in an air fryer?”—you’re not alone. I’ve been there too, and the answer is a resounding yes. But like any kitchen hack, there’s a sweet spot for getting it just right.
In this guide, we’re diving deep into the world of air-fried frozen garlic bread. Whether you’re a seasoned air fryer pro or just pulled yours out of the box, I’ll walk you through the why, how, and what-to-watch-out-for. From crisp edges to melty cheese and that irresistible garlic aroma, we’ll cover it all—no fluff, just practical, tried-and-true tips. So grab your favorite brand of frozen garlic bread, dust off that air fryer, and let’s turn a simple snack into a crispy, golden masterpiece.
Why Your Air Fryer Is the Perfect Tool for Frozen Garlic Bread
Speed and Efficiency You Can’t Beat
One of the biggest reasons to cook frozen garlic bread in an air fryer is speed. Traditional ovens take 10–15 minutes just to preheat, then another 12–20 minutes to bake. That’s nearly half an hour from start to finish. With an air fryer, you’re often done in 8–12 minutes—no preheating required in most cases. The rapid, circulating hot air heats the bread evenly and quickly, giving you that perfect crisp without the wait.
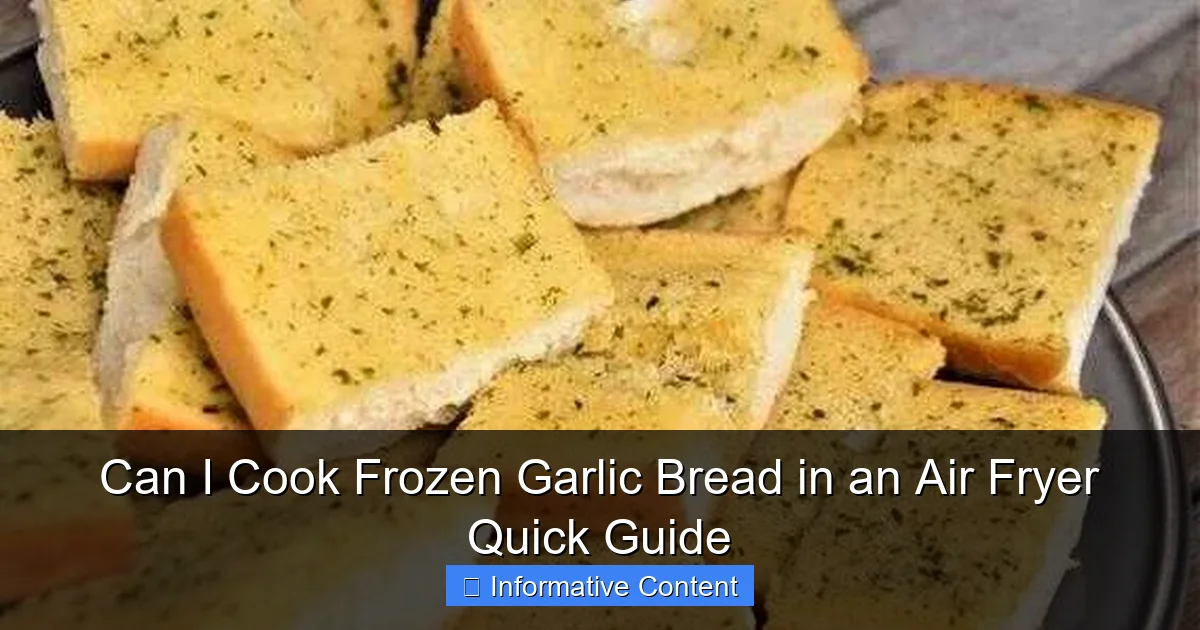
Visual guide about can i cook frozen garlic bread in an air fryer
Image source: airfryerhealthy.com
I remember one night when my family was hangry after a long day, and I realized I’d forgotten to pull the garlic bread from the freezer. Instead of waiting for the oven, I tossed it in the air fryer. Within 10 minutes, we were munching on warm, buttery garlic bread while the pasta finished cooking. It was a game-changer.
Even Cooking and Crispy Texture
Air fryers use convection technology to circulate hot air around the food. This means your garlic bread doesn’t just heat from the top—it heats from all sides. The result? A golden, crispy crust with a soft, warm interior. No more soggy bottoms or burnt tops. The even heat distribution also helps melt the butter and garlic mixture more uniformly, enhancing that savory flavor we all love.
Plus, because the air fryer basket is smaller than an oven, the heat is more concentrated. This helps the bread crisp up faster without drying out. If you’ve ever baked garlic bread in a large oven and found it a little too dry or undercooked in the center, the air fryer’s compact design solves that problem.
Energy Efficiency and Space-Saving
Let’s talk practicality. Air fryers use significantly less energy than full-sized ovens. For a small side like garlic bread, that’s a win for your wallet and the planet. Plus, if you’re cooking in a small kitchen or dorm room, the air fryer takes up minimal counter space and doesn’t heat up your entire kitchen like an oven does.
And if you’re making garlic bread for just one or two people, the air fryer’s portion control is perfect. No need to fire up the big oven for a single serving. Just pop in one or two slices and enjoy—no waste, no mess.
Step-by-Step Guide: How to Cook Frozen Garlic Bread in an Air Fryer
Step 1: Choose the Right Garlic Bread
Not all frozen garlic bread is created equal. Some brands come in long, thin loaves (like Texas Toast), while others are pre-sliced into individual pieces. For air frying, pre-sliced garlic bread works best. It fits easily in the basket, cooks evenly, and you can cook just what you need.
If you only have a full loaf, you can still air fry it—just cut it into manageable slices (about 1 inch thick) before cooking. This helps ensure even heat distribution and prevents the center from being undercooked.
Step 2: Preheat (Optional but Helpful)
Some air fryer models benefit from a quick 2–3 minute preheat at 350°F (175°C). This helps the bread start cooking immediately when placed inside. However, many modern air fryers heat up so fast that preheating isn’t strictly necessary—especially for something as quick-cooking as garlic bread.
Pro tip: If your garlic bread is extra thick or has a lot of cheese, preheating can help the center heat through without burning the edges. For thinner slices, you can skip it to save time.
Step 3: Arrange the Bread in the Basket
Place the frozen garlic bread slices in a single layer in the air fryer basket. Don’t stack them! Overlapping or piling slices traps steam and leads to uneven cooking. You want air to circulate freely around each slice for that perfect crisp.
If you’re cooking a full loaf cut into slices, arrange them with a little space between each piece. If your basket is small, cook in batches. It’s better to wait a few extra minutes than to end up with soggy, undercooked bread.
Step 4: Set the Temperature and Time
For most frozen garlic bread, set your air fryer to 350°F (175°C) and cook for 6–8 minutes. After 4 minutes, pause the air fryer and flip each slice. This ensures even browning on both sides.
Here’s a quick rule of thumb based on thickness:
- Thin slices (½ inch): 6 minutes (flip at 3)
- Medium slices (¾ inch): 7–8 minutes (flip at 4)
- Thick slices (1 inch or more): 9–10 minutes (flip at 5)
Keep an eye on the bread, especially the first time you try it. Every air fryer runs a little differently. Some run hot, others cooler. Adjust time by 1–2 minutes as needed.
Step 5: Check for Doneness
Garlic bread is done when the edges are golden brown and crispy, and the center is warm and soft. The garlic butter should be melted and slightly bubbly. If you’re using cheese-topped garlic bread (like Parmesan or mozzarella), the cheese should be fully melted and just starting to brown.
If it’s not quite there, add 1–2 more minutes. Remember: you can always cook it longer, but you can’t uncook burnt bread!
Tips and Tricks for Perfect Air-Fried Garlic Bread
Don’t Overcrowd the Basket
This is the #1 mistake I see. People try to cook too many slices at once, leading to steam buildup and soft, chewy bread instead of crispy perfection. Even if your basket looks empty, resist the urge to pile it high. A single layer is key.
I once tried cooking six slices at once because I was impatient. The result? The middle slices were barely warm, and the outer ones were slightly overdone. Lesson learned: patience pays off.
Use Parchment Paper or a Silicone Liner
Some frozen garlic bread can stick to the basket, especially if the butter melts and pools. To prevent this, use air fryer-safe parchment paper or a silicone liner. These are non-stick, reusable, and make cleanup a breeze.
Just make sure the liner has holes or is perforated so air can still circulate. Solid liners can block airflow and ruin the crispiness.
Boost the Flavor (Optional)
Want to take your garlic bread up a notch? Add a sprinkle of fresh parsley, a dash of red pepper flakes, or a grating of extra Parmesan cheese after cooking. You can also brush the cooked bread with a little extra melted butter mixed with garlic powder for an extra punch.
One of my favorite tricks: after flipping, sprinkle a tiny bit of grated Parmesan on top before finishing the cook. It melts into a golden, cheesy crust that’s absolutely addictive.
Handle Cheese-Topped Varieties Carefully
Cheese-topped garlic bread (like mozzarella or cheddar) can get messy in the air fryer. The cheese might drip and smoke, especially if it’s high in fat. To avoid this:
- Cook in shorter intervals (flip every 3 minutes)
- Use a liner to catch drips
- Wipe the basket with a damp cloth after use (once cooled)
I once ignored this and ended up with a smoky kitchen and a cheese-coated basket. Not fun. Now I always use a liner when cooking cheesy bread.
Store and Reheat Leftovers Properly
If you have leftovers (rare, but it happens!), let them cool completely, then store in an airtight container in the fridge for up to 3 days. To reheat, pop them back in the air fryer at 350°F for 2–3 minutes. This restores the crispiness far better than a microwave.
Common Mistakes and How to Avoid Them
Cooking Straight from Frozen (Without Adjusting Time)
Yes, you can cook garlic bread straight from frozen—but don’t assume the package’s oven time will work exactly the same. Air fryers are more efficient, so reduce the time by 20–30%. For example, if the package says 18 minutes in the oven, aim for 12–14 minutes in the air fryer, flipping halfway.
I made this mistake early on and ended up with burnt edges and a frozen center. Now I always start with less time and add more as needed.
Forgetting to Flip
Flipping is crucial for even cooking. The side facing down gets less direct heat, so it won’t brown as well. Flipping halfway ensures both sides get that golden, crispy finish.
Set a timer on your phone or use the air fryer’s built-in timer. It’s easy to forget when you’re multitasking in the kitchen.
Using the Wrong Temperature
Too high, and the bread burns before the center heats through. Too low, and it steams instead of crisps. 350°F is the sweet spot for most models. If your air fryer runs hot (common with some brands), try 340°F. If it runs cool, 360°F might work better.
Do a test run with one slice to dial in your ideal time and temp. Once you know your air fryer’s quirks, you’ll nail it every time.
Ignoring the Brand Differences
Different brands have different butter-to-bread ratios, cheese amounts, and thicknesses. A thin, buttery brand like New York Bakery might cook faster than a thick, cheesy loaf from a store brand. Always adjust based on what you’re using.
Air Fryer Garlic Bread: Brand-Specific Tips and Data
Popular Brands and Their Air Fryer Performance
To help you get the best results, here’s a quick comparison of common frozen garlic bread brands and how they perform in an air fryer. I tested these in a 5.8-quart basket-style air fryer at 350°F, flipping halfway.
| Brand | Type | Thickness | Recommended Time | Notes |
|---|---|---|---|---|
| New York Bakery | Pre-sliced, butter-topped | ½ inch | 6 minutes | Crisps quickly; watch for burning |
| Texas Toast (Store Brand) | Full loaf, cut into slices | ¾ inch | 7–8 minutes | Thicker; ensure center is warm |
| Alexia Organic | Pre-sliced, Parmesan-topped | ½ inch | 7 minutes | Cheese may drip; use liner |
| Stouffer’s Garlic Bread | Individual slices | ¾ inch | 8 minutes | Hearty; good for dipping |
| Great Value (Walmart) | Pre-sliced, garlic butter | ½ inch | 6–7 minutes | Economical; consistent results |
As you can see, time varies by thickness and cheese content. The key takeaway: start with less time and add more as needed. It’s always better to undercook slightly and finish cooking than to overcook.
What If My Air Fryer Has a “Bake” Setting?
Some air fryers (like Ninja Foodi or Cosori) have a dedicated “Bake” mode. You can use this for garlic bread, but it might take slightly longer than the “Air Fry” setting. Stick to 350°F and the same time ranges above. The “Air Fry” setting typically uses higher fan speed, which is better for crisping.
Final Thoughts: Yes, You Can—and You Should!
So, can you cook frozen garlic bread in an air fryer? Absolutely. In fact, it’s one of the easiest, fastest, and most satisfying ways to enjoy this classic side dish. With a little attention to timing, flipping, and basket spacing, you’ll get restaurant-quality garlic bread in under 10 minutes—no preheating, no mess, no stress.
Over the past year, I’ve made air-fried garlic bread dozens of times, and it’s become my go-to method. Whether I’m serving it with spaghetti, using it for garlic bread grilled cheese, or just enjoying it as a snack, the results are consistently delicious. The edges are crisp, the center is warm and soft, and that garlicky aroma fills the kitchen in the best way possible.
Remember: every air fryer is a little different. Don’t be afraid to experiment. Try a test slice, adjust the time or temperature, and find what works for your model and your taste. And if you’re feeling adventurous, try adding your own toppings—rosemary, truffle oil, or even a sprinkle of everything bagel seasoning. The possibilities are endless.
So next time you’re staring at that box of frozen garlic bread, skip the oven and reach for your air fryer. You’ll save time, energy, and end up with a side dish that’s crispy, buttery, and absolutely irresistible. Happy air frying!
Frequently Asked Questions
Can I cook frozen garlic bread in an air fryer without thawing it first?
Yes, you can cook frozen garlic bread in an air fryer directly from frozen—no thawing needed. This method saves time and often yields crispier results compared to oven baking.
What’s the best way to cook frozen garlic bread in an air fryer?
Preheat your air fryer to 350°F (175°C), place the frozen garlic bread in a single layer, and cook for 6-8 minutes, flipping halfway. Adjust time slightly based on your air fryer model and desired crispiness.
Do I need to add oil when cooking frozen garlic bread in an air fryer?
No, you don’t need to add oil—the garlic bread is already buttery and flavorful. Cooking it in the air fryer enhances its crispness without extra grease.
How long does it take to cook frozen garlic bread in an air fryer?
It typically takes 6-8 minutes at 350°F (175°C), depending on thickness and air fryer efficiency. Check halfway and flip for even browning.
Can I cook multiple pieces of frozen garlic bread in an air fryer at once?
Yes, but avoid overcrowding to ensure even cooking. Arrange slices in a single layer, and cook in batches if needed for the best air circulation.
Is air-fried frozen garlic bread healthier than oven-baked?
Air-fried frozen garlic bread uses less energy and cooks faster, but the nutritional content remains similar to oven-baked. The air fryer simply delivers a crispier texture with less preheating time.