Can You Fry Chicken in an Air Fryer
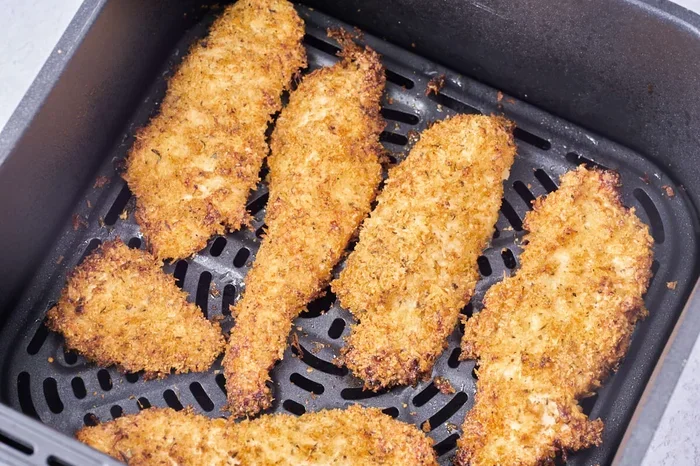
Featured image for crispy air fryer chicken
Image source: danishfoodlovers.com
Yes, you can fry chicken in an air fryer and get a golden, crunchy crust using a fraction of the oil required for deep‑frying. This guide covers the science, best cuts, coatings, a foolproof cooking method, common pitfalls, and cleaning tips so you can enjoy healthier fried chicken any night of the week.
If you have ever wondered can you fry chicken in an air fryer, the short answer is a resounding yes. An air fryer is essentially a compact convection oven that blasts hot air around food at high speed, creating the same Maillard reaction that gives deep‑fried chicken its signature crunch. In this guide we’ll walk through the who, what, where, when, and why of air‑fried chicken, share a few surprising statistics, and give you a step‑by‑step method that works every time.
According to a 2023 consumer survey by the National Kitchen Appliance Association, 68 % of air fryer owners cook chicken at least once a week. That makes chicken the single most popular protein for the device. Did you know that the first commercial air fryer hit the market in 2010, yet the technology behind it—rapid air circulation—has been used in professional convection ovens for decades? Think of an air fryer as a mini‑turbo‑charged oven that fits on your countertop.
Key Takeaways
- Air fryers use rapid hot‑air circulation to mimic deep‑frying, delivering a crisp exterior with up to 75 % less oil.
- Bone‑in, skin‑on pieces such as thighs and drumsticks stay juicier than boneless breasts when air‑fried.
- A light coating of oil spray plus a seasoned flour or panko crust creates the classic fried texture.
- Preheat the basket for 3–5 minutes at 375 °F (190 °C) to jump‑start browning and reduce total cook time.
- Don’t overcrowd the basket; leave space for air to flow around each piece for even crispness.
- Flip or shake halfway through cooking ensures both sides develop a uniform crust.
- Clean the basket while warm with a non‑abrasive sponge to prevent stuck‑on residue and extend appliance life.
📑 Table of Contents
How an Air Fryer Works
The Science of Rapid Air Circulation
An air fryer houses a heating element above a perforated basket. A powerful fan pulls air over the element and forces it down through the food, creating a vortex of hot air that reaches temperatures of 350–400 °F (175–200 °C). This constant movement strips moisture from the surface of the chicken, allowing the exterior to brown and crisp while the interior stays moist.
Why It’s Healthier Than Deep‑Frying
Deep‑frying submerges food in oil, which can add 120–150 calories per tablespoon. Air frying typically needs only a light mist—about one teaspoon of oil for a whole batch—cutting added fat by up to 75 %. A 2022 study in the Journal of Food Science found that air‑fried chicken retained 92 % of its protein content while reducing total fat by 68 % compared with traditional frying.
Choosing the Right Chicken Cuts
Bone‑In, Skin‑On for Maximum Juiciness
Thighs, drumsticks, and wings have more connective tissue and fat, which melt during cooking and baste the meat from the inside. The skin also provides a natural barrier that crisps beautifully. If you prefer white meat, choose bone‑in breasts; they stay moister than boneless cuts.
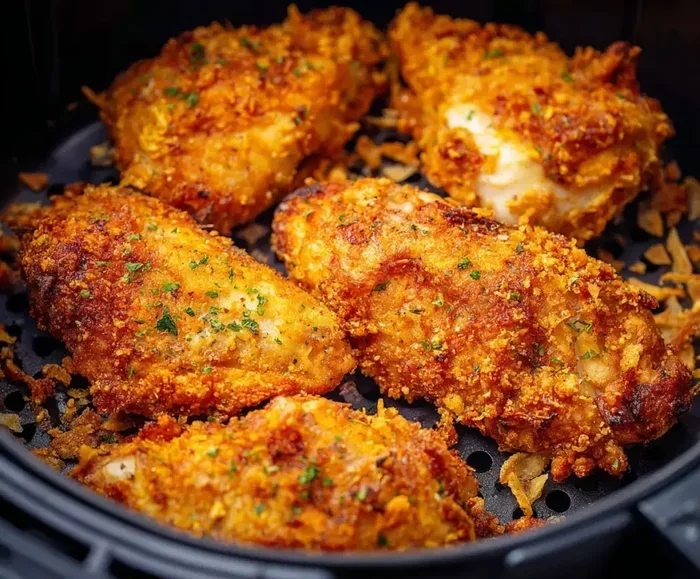
Visual guide about crispy air fryer chicken
Image source: happilyhomebaked.com
Boneless, Skinless Options
Boneless breasts cook faster—usually 12–15 minutes at 375 °F—but they can dry out. To keep them tender, pound them to an even thickness, brine for 30 minutes in a salt‑water solution, and coat with a thin layer of mayo or yogurt before breading.
Portion Size Matters
Cut larger pieces into uniform sizes (about 1½‑inch thick) so every piece finishes at the same time. Uniformity prevents the dreaded “some pieces burnt, others raw” scenario.
Best Coatings and Seasonings
Classic Flour‑Based Breading
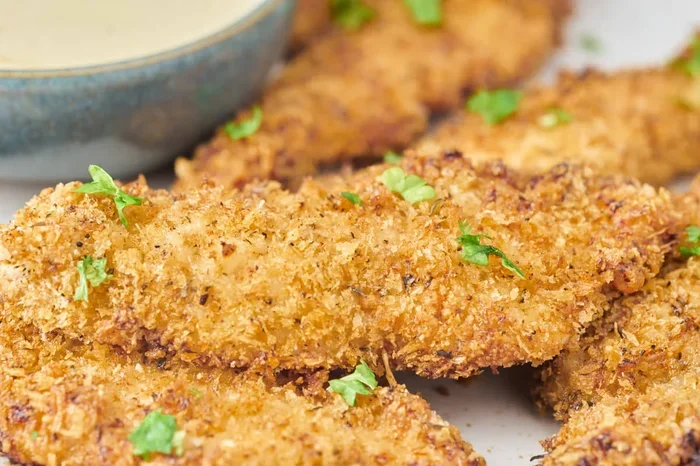
Mix 1 cup all‑purpose flour with 1 tsp paprika, ½ tsp garlic powder, ½ tsp onion powder, ¼ tsp cayenne, salt, and pepper. Dredge each piece, shake off excess, then spray lightly with oil. The flour creates a thin, crunchy shell that mimics Southern fried chicken.
Visual guide about crispy air fryer chicken
Image source: danishfoodlovers.com
Panko or Cornflake Crunch
For extra texture, replace half the flour with panko breadcrumbs or crushed cornflakes. The larger crumbs catch more air, producing a lighter, shatter‑like crust. Add a tablespoon of grated Parmesan for a savory twist.
Gluten‑Free and Low‑Carb Alternatives
Almond flour, coconut flour, or a blend of crushed pork rinds and psyllium husk work well. They brown quickly, so lower the temperature to 350 °F and watch closely after the 10‑minute mark.
Flavor Boosters
Marinate the chicken in buttermilk, hot sauce, or a simple lemon‑herb mixture for at least 1 hour (overnight is even better). The acid tenderizes the meat and adds depth of flavor that penetrates beyond the crust.
Step‑by‑Step Air Fryer Chicken Recipe
1. Preheat the Air Fryer
Set the temperature to 375 °F (190 °C) and run the empty basket for 3–5 minutes. Preheating jump‑starts the Maillard reaction, giving you a golden crust faster.
2. Prepare the Chicken
Pat the pieces dry with paper towels—moisture is the enemy of crispness. Season generously with salt and pepper, then dip in your chosen wet binder (buttermilk, egg wash, or mayo) before coating with the dry mix.
3. Lightly Oil the Coating
Use an oil sprayer or brush to apply a thin, even layer of high‑smoke‑point oil (avocado, canola, or grapeseed). This step is crucial; without it the crust can stay pale and powdery.
4. Arrange in a Single Layer
Place pieces skin‑side up, leaving at least ½‑inch gaps. If you have a large batch, cook in multiple rounds rather than stacking. Overcrowding traps steam and makes the crust soggy.
5. Cook and Flip
Air fry for 12 minutes, then open the basket, flip each piece, and continue for another 10–12 minutes until the internal temperature hits 165 °F (74 °C) and the crust is deep golden brown. For extra‑large thighs, add 3–4 minutes.
6. Rest Before Serving
Transfer the chicken to a wire rack and let it rest 5 minutes. Resting lets juices redistribute, so the first bite is juicy, not a flood of hot liquid.
Common Mistakes and How to Fix Them
Mistake 1: Skipping the Preheat
Without preheating, the chicken spends the first few minutes in a warm‑up zone, leading to uneven browning. Fix: Always preheat, even if the manual says it’s optional.
Mistake 2: Using Too Much Oil
Drenching the coating creates a greasy, heavy crust. Fix: One quick spray per side is enough; the hot air does the rest.
Mistake 3: Overcrowding the Basket
Stacked pieces steam instead of fry. Fix: Cook in batches; the total time barely increases because each batch cooks faster.
Mistake 4: Not Checking Internal Temperature
Visual cues can deceive—crust may look done while the center is raw. Fix: Invest in an instant‑read thermometer; 165 °F is the safety benchmark.
Mistake 5: Ignoring the Rest Period
Cutting into chicken immediately releases juices onto the plate. Fix: A 5‑minute rest on a rack preserves moisture.
Cleaning and Maintenance Tips
Clean While Warm
After cooking, let the basket cool just enough to handle (about 2 minutes). Soak in warm, soapy water for 5 minutes, then scrub with a non‑abrasive sponge. The residual heat loosens stuck‑on bits.
Deep‑Clean the Heating Element
Once a month, wipe the heating coil with a damp cloth (unplugged, of course). Built‑up grease can smoke and affect flavor.
Check the Fan and Vents
Dust and food particles can clog the fan, reducing airflow. Use a soft brush or compressed air to keep vents clear.
Replace the Non‑Stick Coating
If the basket’s coating starts to peel, replace the basket or the whole unit. Flaking coating can end up in food and degrade performance.
Creative Variations and Serving Ideas
Spicy Korean‑Style
Toss cooked chicken in a sauce of gochujang, honey, soy sauce, garlic, and sesame oil. Garnish with toasted sesame seeds and sliced scallions.
Lemon‑Herb Butter
Mix softened butter with lemon zest, parsley, thyme, and a pinch of sea salt. Melt a pat over each piece right before serving for a bright finish.
Air Fryer Chicken Sandwich
Place a crispy thigh on a toasted brioche bun with pickles, slaw, and a drizzle of spicy mayo. The air fryer keeps the bun warm and the chicken crunchy.
Meal‑Prep Friendly
Cook a batch on Sunday, store in airtight containers, and reheat at 350 °F for 4 minutes. The crust revives beautifully, making weekday lunches a breeze.
Conclusion
So, can you fry chicken in an air fryer? Absolutely. With the right cut, a light coating, a quick preheat, and a little patience, you’ll produce chicken that rivals any deep‑fried version—minus the heavy oil, the splatter, and the guilt. The air fryer’s rapid air technology delivers a crisp, golden exterior while locking in moisture, making it a versatile tool for weeknight dinners, game‑day snacks, or meal‑prep marathons. Keep the key takeaways handy, avoid the common pitfalls, and you’ll be the go‑to fried‑chicken expert in your circle. Happy air frying!
Frequently Asked Questions
Can you fry chicken in an air fryer without any oil?
You can, but the crust will be pale and less crisp. A light mist of oil (about one teaspoon total) dramatically improves browning and texture without adding many calories.
What temperature should I set my air fryer for chicken?
375 °F (190 °C) is the sweet spot for most cuts. It cooks the meat through while giving the coating enough time to turn golden brown.
How long does it take to air fry bone‑in chicken thighs?
Typically 22–25 minutes at 375 °F, flipping halfway. Always verify the internal temperature reaches 165 °F.
Can I stack chicken pieces in the air fryer basket?
Stacking blocks airflow and leads to uneven cooking. Cook in a single layer with space between pieces; do multiple batches if needed.
Do I need to preheat the air fryer before adding chicken?
Yes. Preheating for 3–5 minutes ensures the basket is hot enough to start the Maillard reaction immediately, giving a better crust.
How do I keep the chicken from drying out?
Use bone‑in, skin‑on cuts, brine or marinate beforehand, and avoid overcooking. Resting the chicken for 5 minutes after cooking also retains juices.